7.6 KiB
Tutorial 4 - Site Search
Overview
This is a short tutorial demonstrating how to add search functionality to a SilverStripe site. It is recommended that you have completed the earlier tutorials, especially the tutorial on forms, before attempting this tutorial. While this tutorial will add search functionality to the site built in the previous tutorials, it should be straight forward to follow this tutorial on any site of your own.
What are we working towards?
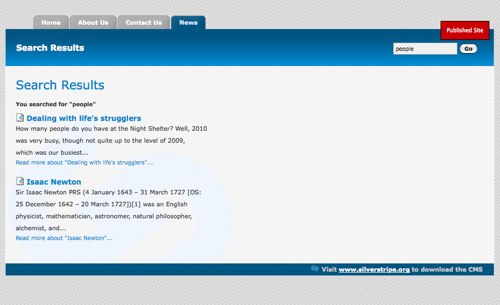
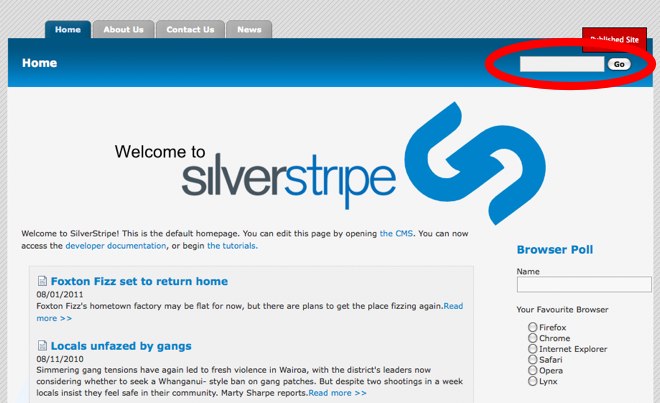
We are going to add a search box on the top of the page. When a user types something in the box, they are taken to a results page.
Creating the search form
The Search Form functionality has been altered over time. Please use the section which applies to your SilverStripe version.
2.4 and newer
SilverStripe 2.4 does not come bundled with the search engine enabled. To enable the search engine you need to include the following code in your mysite/_config.php file
:::php
FulltextSearchable::enable();
After including that in your _config.php you will need to rebuild the database by visiting http://yoursite.com/dev/build in your web browser. This will add the fulltext search columns.
The actual search form code is already provided in FulltextSearchable so when you add the enable line above to your _config you can add your form as $SearchForm.
2.3
SilverStripe 2.3 came bundled with the code as well as a MySQL Search engine. If you are using the blackcandy theme you should have everything you need already to have a search. If you are using the tutorial theme then you can simply skip down to 'Adding the search form' as the PHP code is already provided in Page.php. If it is not then you can follow the instructions below as well.
2.2
If you are using SilverStripe 2.2 or earlier then you need to define your own code. The first step in implementing search on your site is to create a form for the user to type their query. Create a function named SearchForm on the Page_Controller class (/mysite/code/Page.php).
:::php
class Page_Controller extends ContentController {
	function SearchForm() {
		$searchText = isset($this->Query) ? $this->Query : 'Search';

		$fields = new FieldSet(
			new TextField("Search", "", $searchText)
		);

		$actions = new FieldSet(
			new FormAction('results', 'Go')
		);

		return new SearchForm($this, "SearchForm", $fields, $actions);
	}
}
Custom CSS code
Add the following css code to the themes/tutorial/css/layout.css file. This will style the header form and search results page.
:::css
#Header form {
	float:right;
	width:160px;
	margin:25px 25px 0px 25px;
}
	#Header form * {
		display:inline !important;
	}
	#Header form div {
	}
	#Header form input.text {
		width:110px;
		color:#000;
		background:#f0f0f0;
		border:1px solid #aaa;
		padding:3px;
	}
	#Header form input.action {
		font-weight:bold;
	}

.searchResults h2 {
	font-size:2.2em;
	font-weight:normal;
	color:#0083C8;
	margin-bottom:15px;
}
.searchResults p.searchQuery {
	color:#333;
	margin-bottom:10px;
}

.searchResults ul#SearchResults li {
	margin-bottom:20px;
}
	ul#SearchResults p {
		font-size:1.1em;
		font-weight:normal;
		line-height:2em;
		color:#333;
	}
	ul#SearchResults a.searchResultHeader {
		font-size:1.3em;
		font-weight:bold;
		color:#0083C8;
		text-decoration:none;
		margin:20px 0 8px 0;
		padding-left:20px;
		background:url(../images/treeicons/search-file.gif) no-repeat left center;
	}
		ul#SearchResults a {
			text-decoration:none;
			color:#0083C8;
		}
		ul#SearchResults a:hover {
		border-bottom:1px dotted #0083C8;
		}
Adding the search form
We then just need to add the search form to the template. Add $SearchForm to the 'Header' div in themes/tutorial/templates/Page.ss.
themes/tutorial/templates/Page.ss
:::ss
<div id="Header">
	$SearchForm
	<h1>$Title</h1>
</div>
Showing the results
Next we need to create the results function.
mysite/code/Page.php
:::php
class Page_Controller extends ContentController {
	...

	function results($data, $form){
		$data = array(
			'Results' => $form->getResults(),
			'Query' => $form->getSearchQuery(),
			'Title' => 'Search Results'
		);
		$this->Query = $form->getSearchQuery();

		return $this->customise($data)->renderWith(array('Page_results', 'Page'));
	}
}
First we populate an array with the data we wish to pass to the template - the search results, query and title of the page. The final line is a little more complicated.
When we call a function by its url (eg http://localhost/home/results), SilverStripe will look for a template with the
name PageType_function.ss. As we are implementing the results function on the Page page type, we create our
results page template as Page_results.ss. Unfortunately this doesn't work when we are using page types that are
children of the Page page type. For example, if someone used the search on the homepage, it would be rendered with
Homepage.ss rather than Page_results.ss. SilverStripe always looks for the template from the most specific page type
first, so in this case it would use the first template it finds in this list:
- HomePage_results.ss
- HomePage.ss
- Page_results.ss
- Page.ss
We can override this list by using the renderWith function. The renderWith function takes an array of the names of the templates you wish to render the page with. Here we first add the data to the page by using the 'customise' function, and then attempt to render it with Page_results.ss, falling back to Page.ss if there is no Page_results.ss.
Creating the template
Lastly we need to create the template for the search page. This template uses all the same techniques used in previous
tutorials. It also uses a number of pagination variables, which are provided by the [api:DataObjectSet]
class.
themes/tutorial/templates/Layout/Page_results.ss
:::ss
<div id="Content" class="searchResults">
<h2>$Title</h2>
<% if Query %>
<p class="searchQuery"><strong>You searched for "{$Query}"</strong></p>
<% end_if %>
<% if Results %>
<ul id="SearchResults">
<% control Results %>
<li>
<a class="searchResultHeader" href="$Link">
<% if MenuTitle %>
$MenuTitle
<% else %>
$Title
<% end_if %>
</a>
<p>$Content.LimitWordCountXML</p>
<a class="readMoreLink" href="$Link" title="Read more about "{$Title}"">Read more about "{$Title}"...</a>
</li>
<% end_control %>
</ul>
<% else %>
<p>Sorry, your search query did not return any results.</p>
<% end_if %>
<% if Results.MoreThanOnePage %>
<div id="PageNumbers">
<% if Results.NotLastPage %>
<a class="next" href="$Results.NextLink" title="View the next page">Next</a>
<% end_if %>
<% if Results.NotFirstPage %>
<a class="prev" href="$Results.PrevLink" title="View the previous page">Prev</a>
<% end_if %>
<span>
<% control Results.Pages %>
<% if CurrentBool %>
$PageNum
<% else %>
<a href="$Link" title="View page number $PageNum">$PageNum</a>
<% end_if %>
<% end_control %>
</span>
<p>Page $Results.CurrentPage of $Results.TotalPages</p>
</div>
<% end_if %>
</div>
Then finally add ?flush=1 to the URL and you should see the new template.

Summary
This tutorial has demonstrated how easy it is to have full text searching on your site. To add search to a SilverStripe site, only a search form and a results page need to be created.