8.6 KiB
| keywords | image | description | sidebar_position | sidebar_label | ||||||
|---|---|---|---|---|---|---|---|---|---|---|
|
./unix-v6-SIMH-PDP-11-23.webp | We can run ! Unix v6 on the SIMH PDP-11 emulator. First, we need to download the ! Unix v6 tape. You can download the tape needed to run it on the SIMH PDP-11 emulator from the squoze.net website. | 1 | ! Unix v6 on SIMH PDP-11 |
How to install ! Unix v6 on SIMH PDP-11 emulator?
We can run ! Unix v6 on the SIMH PDP-11 emulator. First, we need to download the ! Unix v6 tape.
Downloads
You can download the tape needed to run ! Unix v6 on the SIMH PDP-11 emulator from the squoze.net website:
Installing ! Unix v6
:::tip
If you have not already installed SIMH PDP-11 emulator, see the VirtualHub Setup tutorial on how to do so on Linux and Windows.
:::
Create a folder somewhere to store the files for this VM and move the dist.tap file into it.
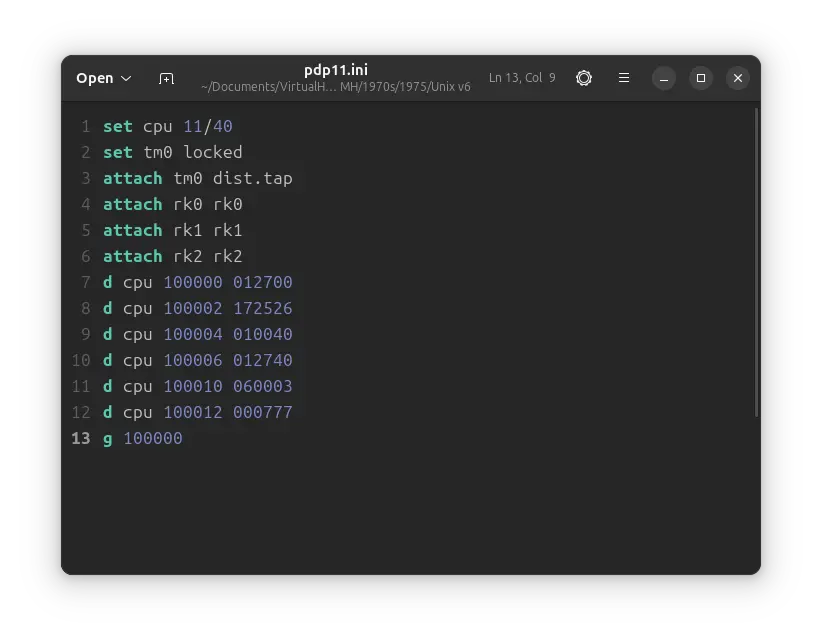
Now we will create a temporary config file for our VM. Create a text file called pdp11.ini with the following content in the VM folder:
set cpu 11/40
set tm0 locked
attach tm0 dist.tap
attach rk0 rk0
attach rk1 rk1
attach rk2 rk2
d cpu 100000 012700
d cpu 100002 172526
d cpu 100004 010040
d cpu 100006 012740
d cpu 100010 060003
d cpu 100012 000777
g 100000
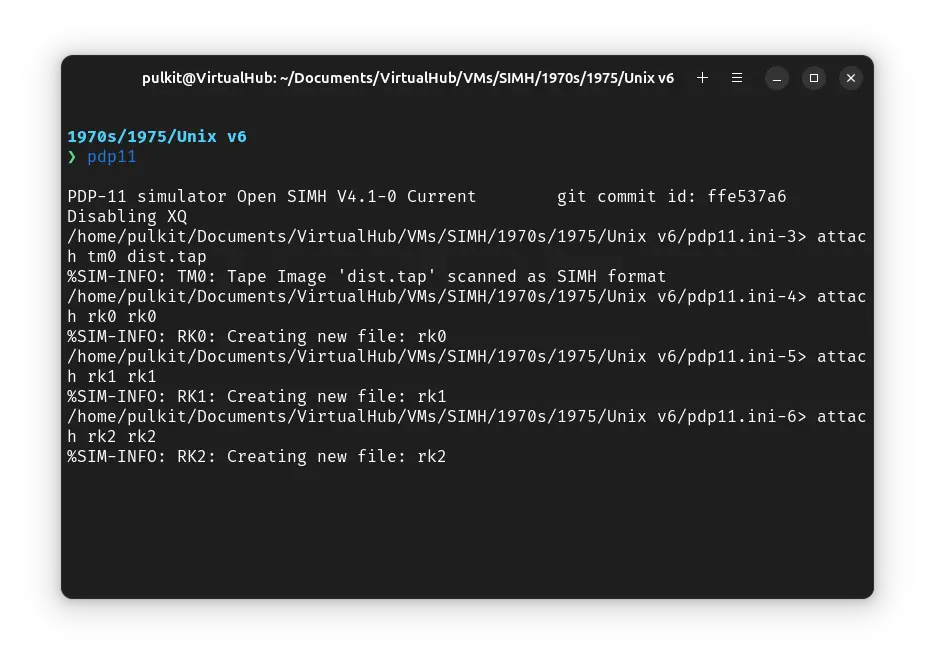
Now open a terminal and move to the VM folder. Run the following command to start the emulator:
pdp11
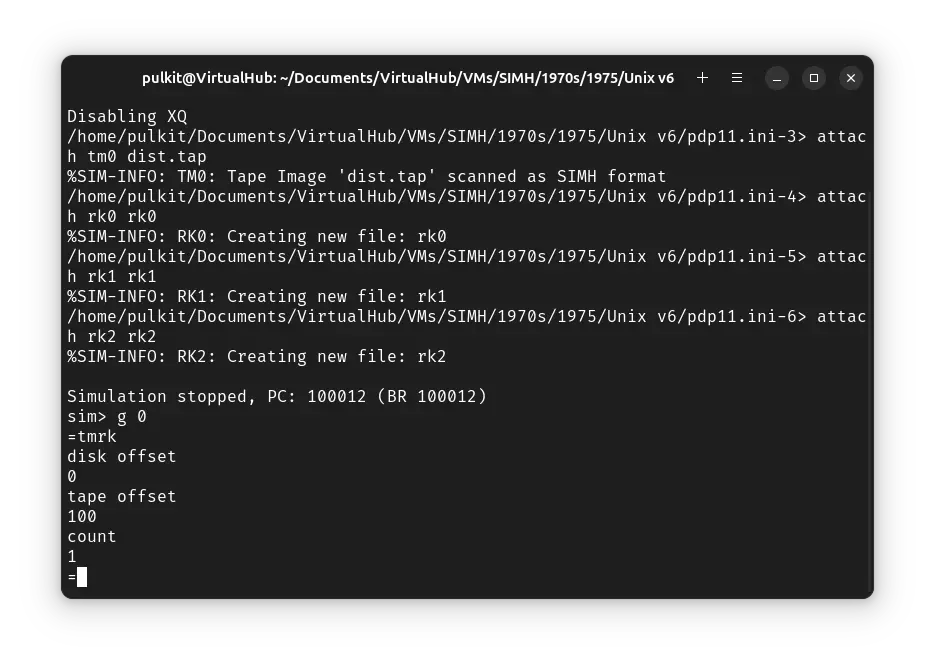
After the emulator starts, press Ctrl + e. You will get a sim> prompt. Type g 0 to start the emulation.
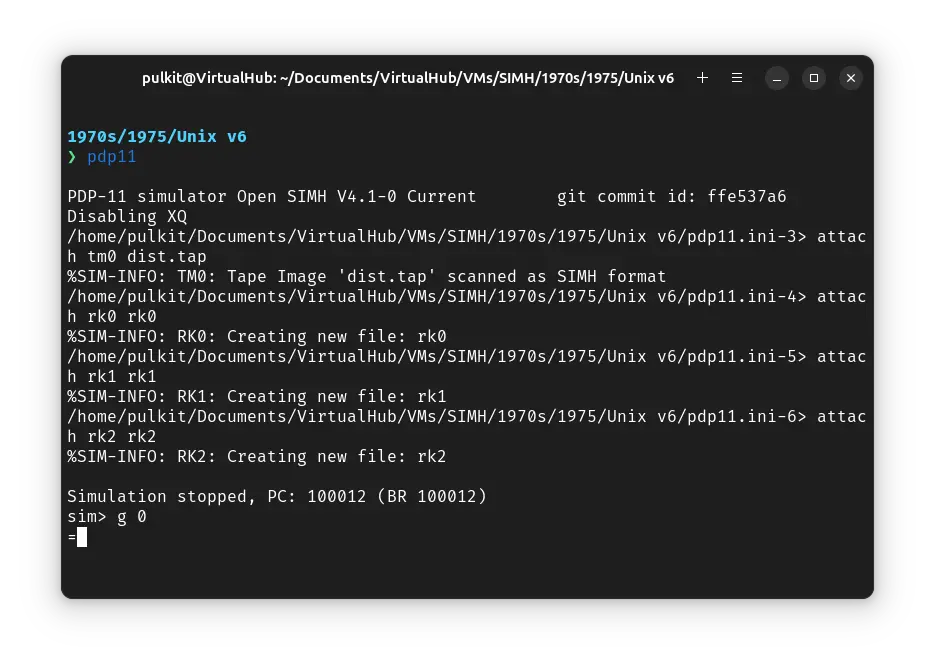
You will get an = prompt. Type tmrk and press enter. When asked for disk offset, type 0 and press enter. For tape offset, enter 100 and for count 1.
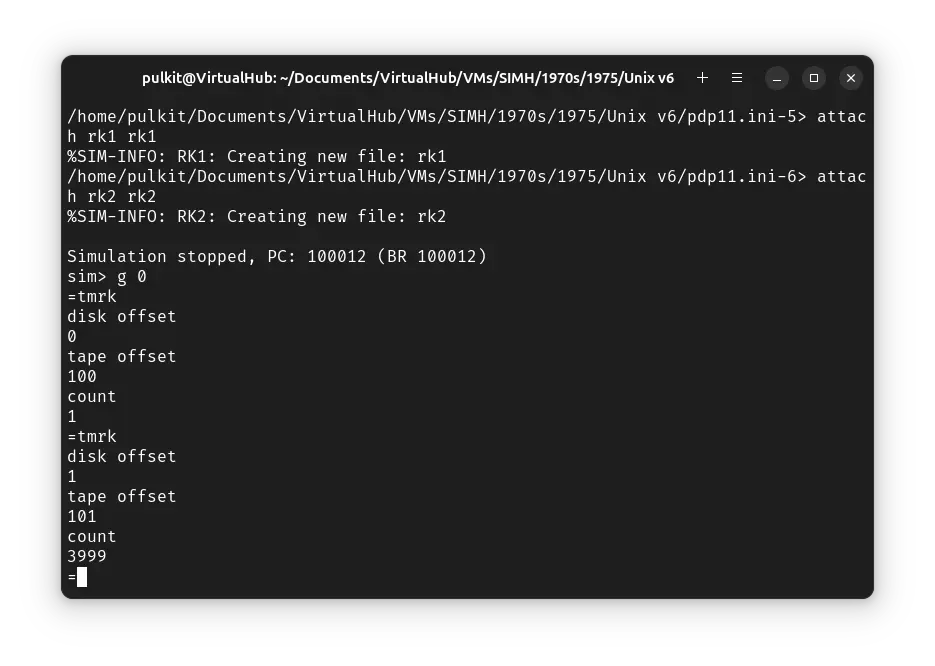
You will get back to an = prompt. Run tmrk again. This time, for disk offset, enter 1, for tape offset 101 and for count 3999.
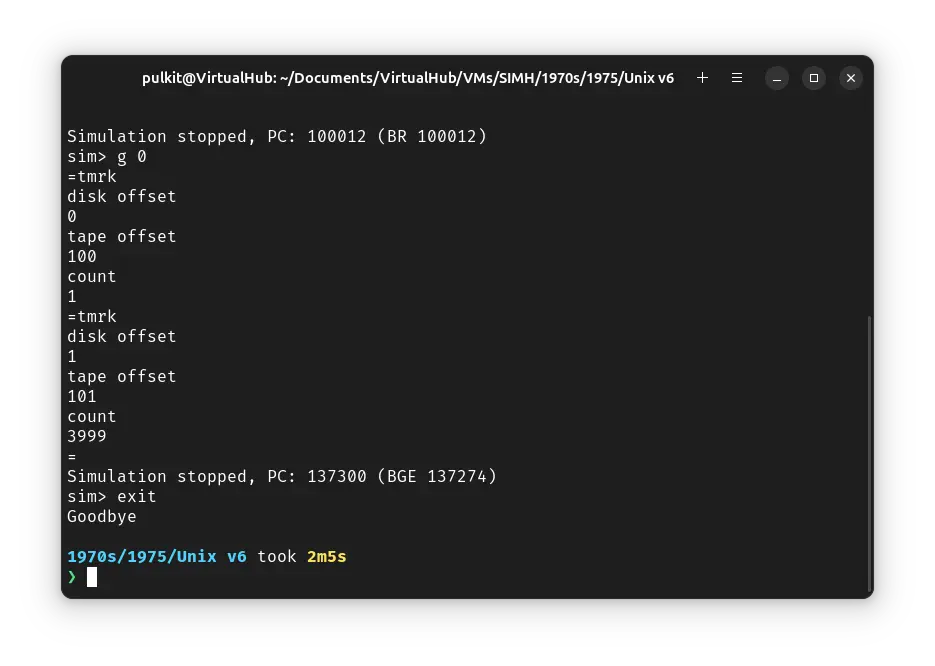
We have successfully copied the base ! Unix files to our disk. Now press Ctrl + e and enter exit to quit the emulator.
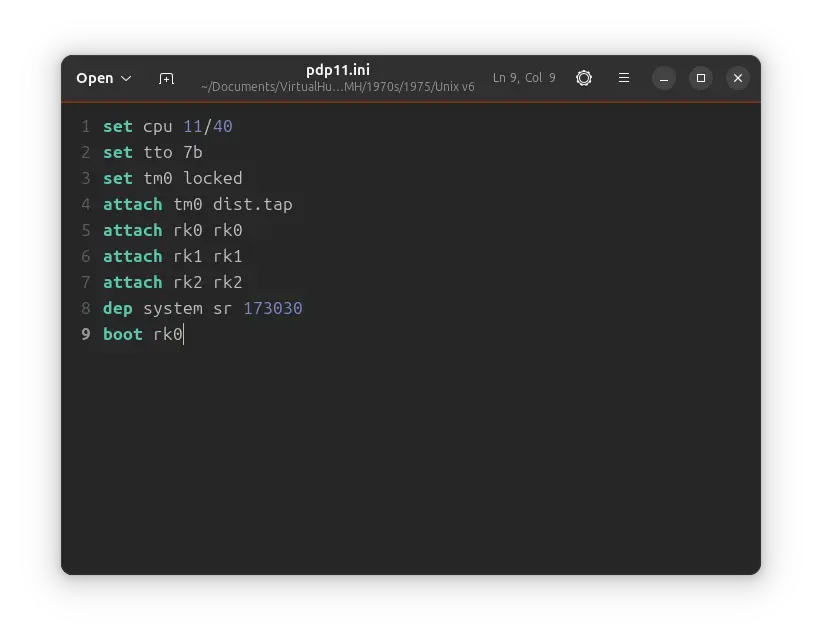
Now we modify the pdp11.ini file and make it as follow:
set cpu 11/40
set tto 7b
set tm0 locked
attach tm0 dist.tap
attach rk0 rk0
attach rk1 rk1
attach rk2 rk2
dep system sr 173030
boot rk0
Once again, open a terminal and move to the VM folder. Run the following command to start the emulator:
pdp11
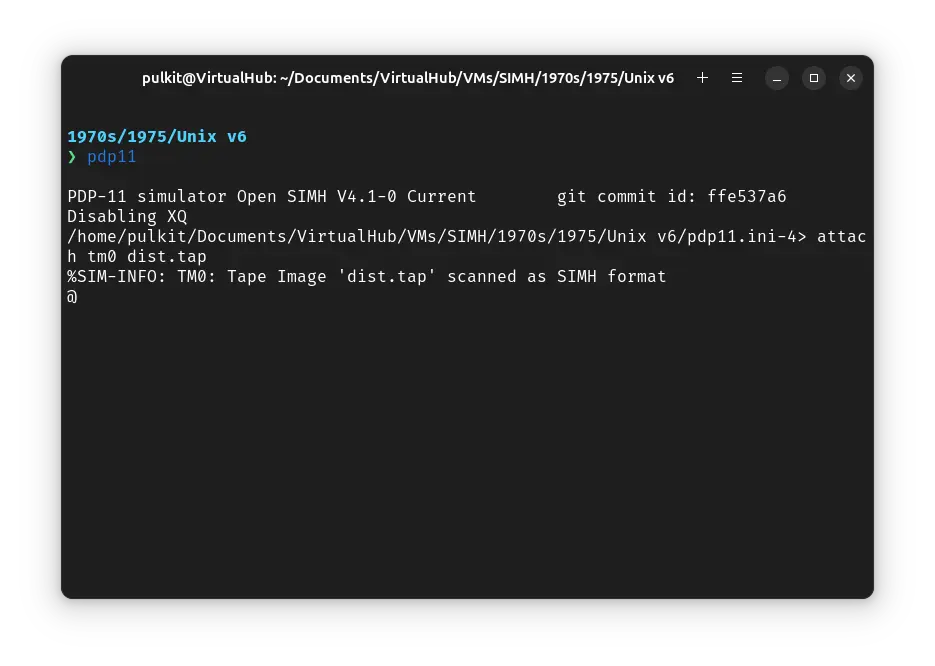
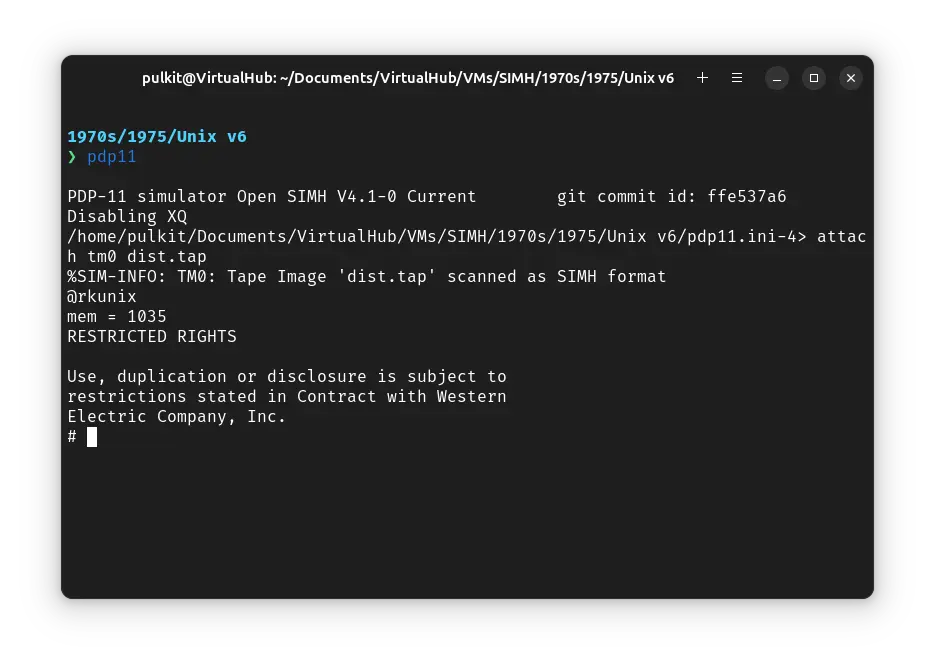
At the @ prompt, type rkunix and press enter. ! Unix will start.
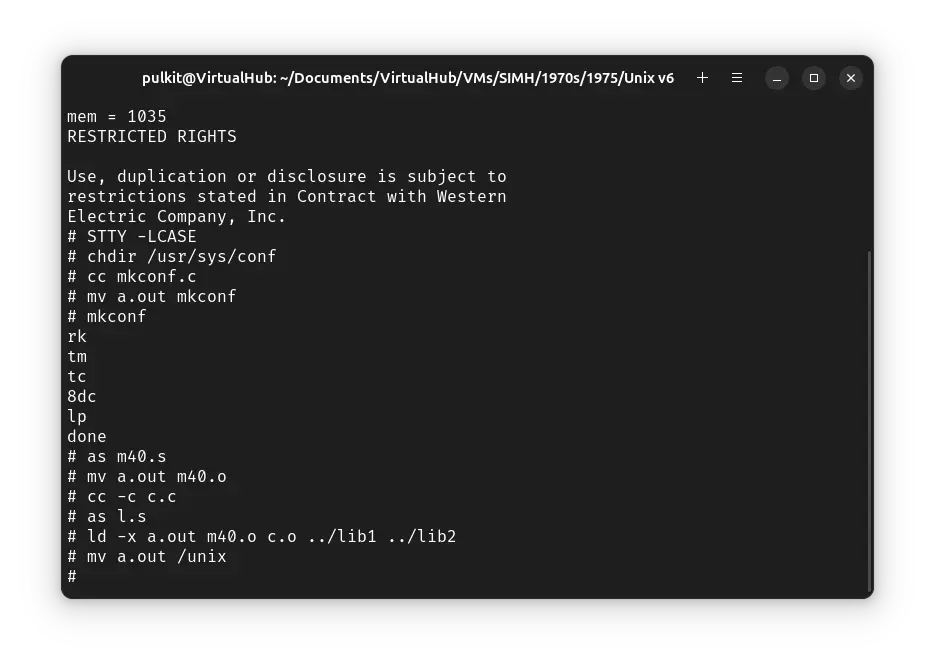
Now we will rebuild the kernel to support the devices supported bu SIMH. First run STTY -LCASE to make ! Unix use lowercase. Now run the following commands (pressing enter after each lines) to build the mkconf executable:
chdir /usr/sys/conf
cc mkconf.c
mv a.out mkconf
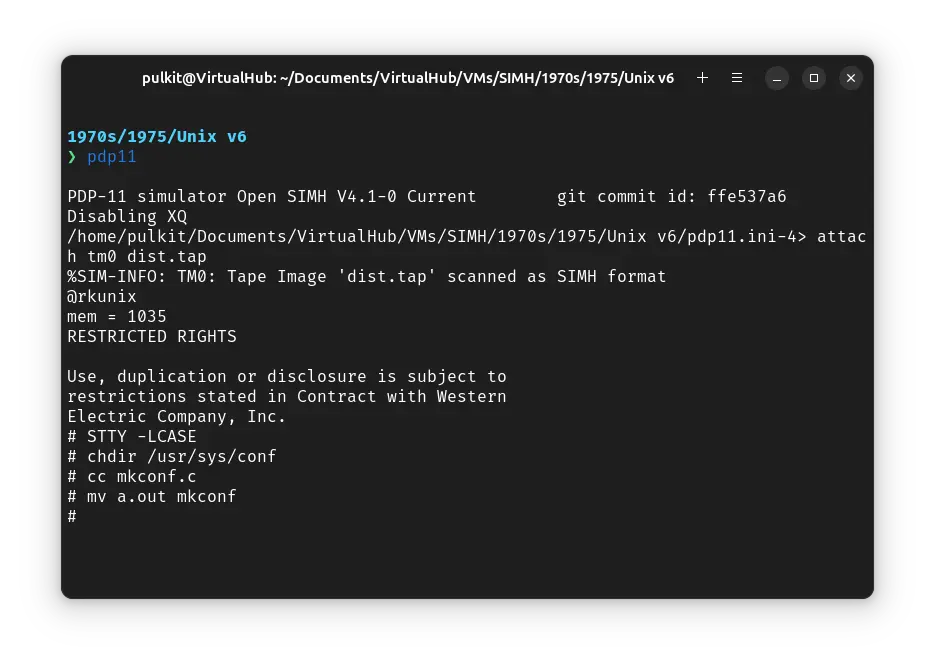
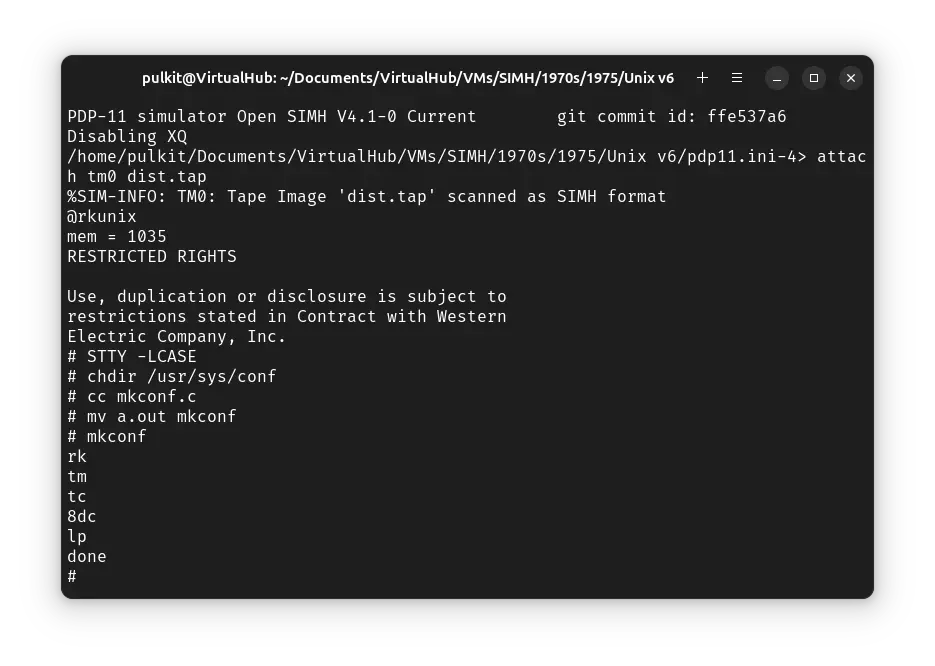
Now we will use mkconf. Run mkconf and then type the following, pressing enter after each line:
rk
tm
tc
8dc
lp
done
We will now build the kernel and move it to root. Run the following commands:
as m40.s
mv a.out m40.o
cc -c c.c
as l.s
ld -x a.out m40.o c.o ../lib1 ../lib2
mv a.out /unix
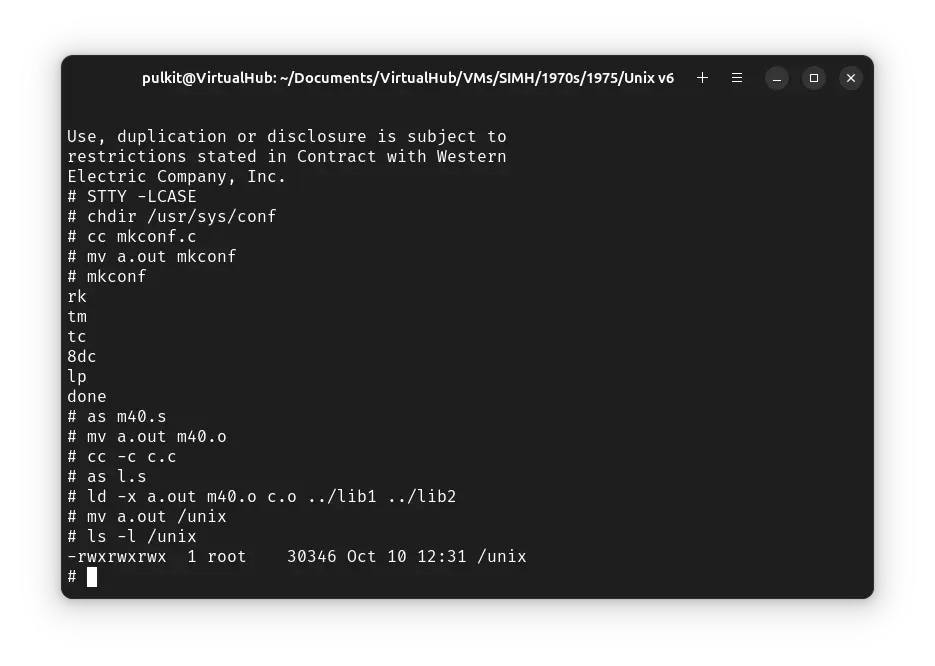
To verify that the kernel is successfully installed in root, run the following command:
ls -l /unix
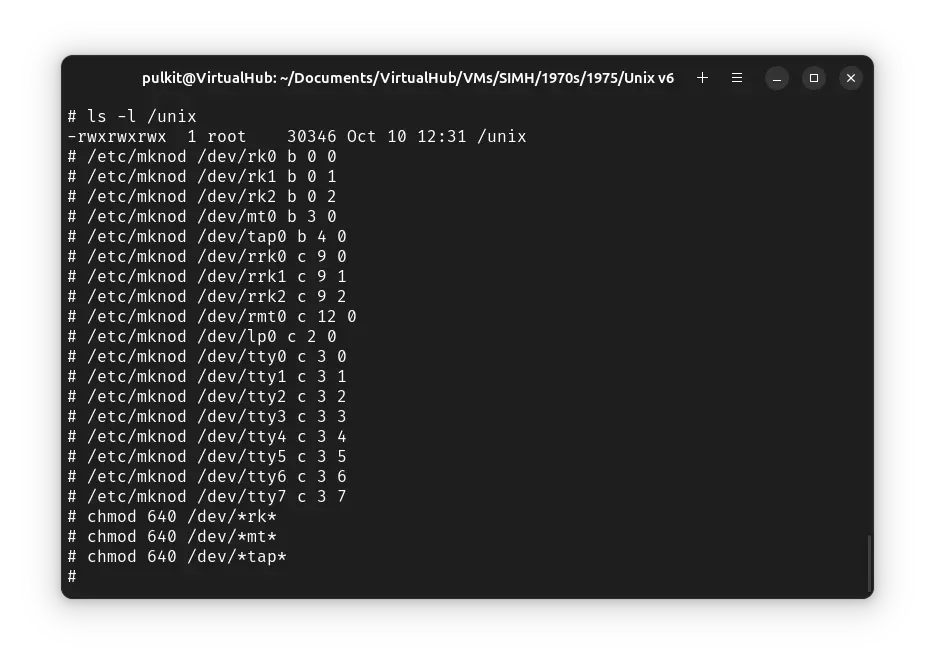
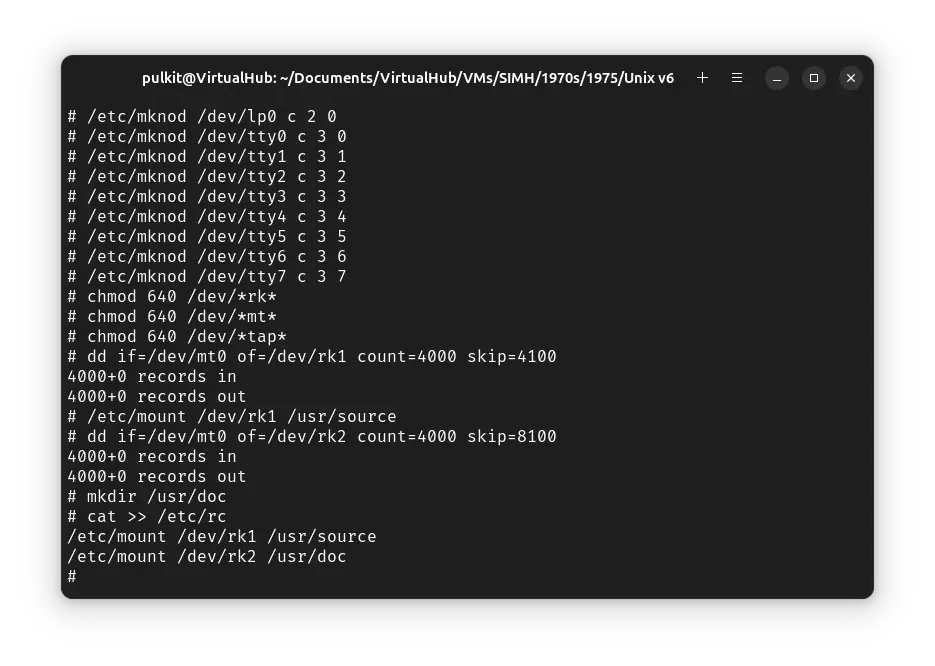
We will configure the device files now. Run the following commands one by one:
/etc/mknod /dev/rk0 b 0 0
/etc/mknod /dev/rk1 b 0 1
/etc/mknod /dev/rk2 b 0 2
/etc/mknod /dev/mt0 b 3 0
/etc/mknod /dev/tap0 b 4 0
/etc/mknod /dev/rrk0 c 9 0
/etc/mknod /dev/rrk1 c 9 1
/etc/mknod /dev/rrk2 c 9 2
/etc/mknod /dev/rmt0 c 12 0
/etc/mknod /dev/lp0 c 2 0
/etc/mknod /dev/tty0 c 3 0
/etc/mknod /dev/tty1 c 3 1
/etc/mknod /dev/tty2 c 3 2
/etc/mknod /dev/tty3 c 3 3
/etc/mknod /dev/tty4 c 3 4
/etc/mknod /dev/tty5 c 3 5
/etc/mknod /dev/tty6 c 3 6
/etc/mknod /dev/tty7 c 3 7
chmod 640 /dev/*rk*
chmod 640 /dev/*mt*
chmod 640 /dev/*tap*
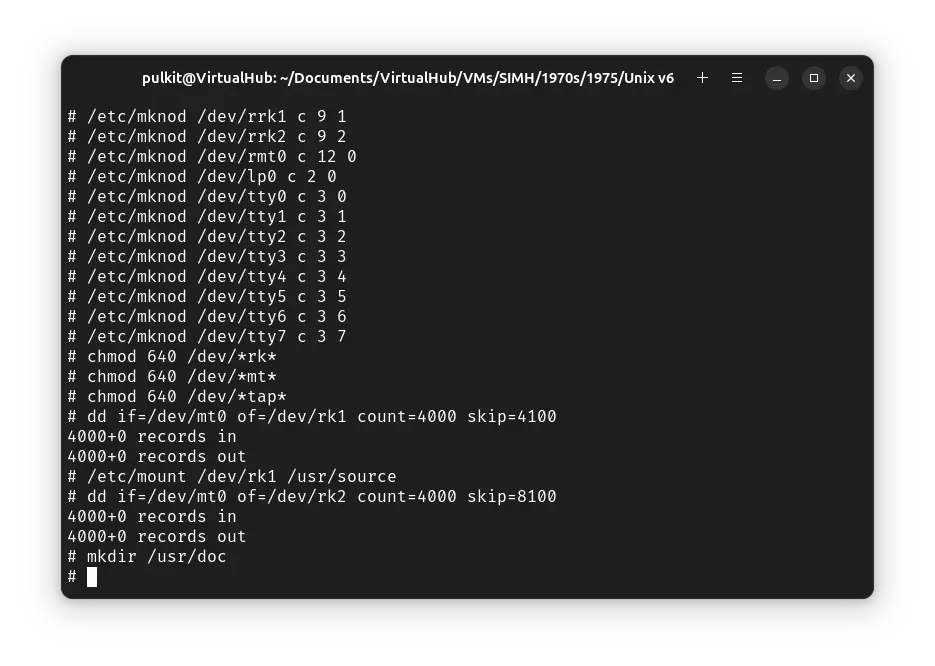
We will copy the source and documentation of ! Unix v6 from the tape to disks now. Run the following commands:
dd if=/dev/mt0 of=/dev/rk1 count=4000 skip=4100
/etc/mount /dev/rk1 /usr/source
dd if=/dev/mt0 of=/dev/rk2 count=4000 skip=8100
mkdir /usr/doc
We will add configuration to mount the source and doc disk to correct location on each boot. To do so, run cat >> /etc/rc and then type the following two lines (pressing enter after each line):
/etc/mount /dev/rk1 /usr/source
/etc/mount /dev/rk2 /usr/doc
Then press Ctrl + D.
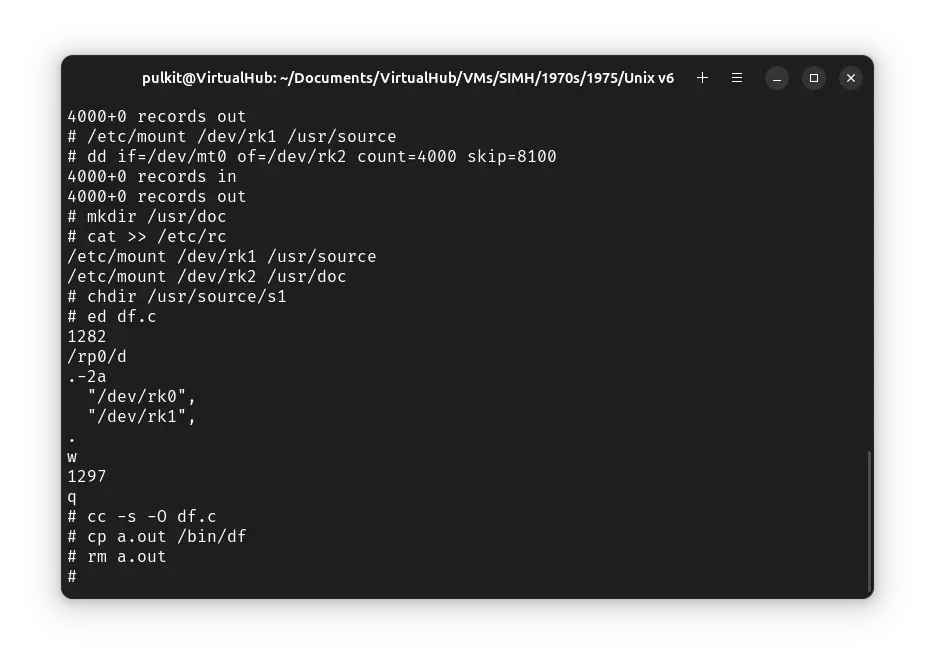
Now we will rebuild the df command. To configure df, run chdir /usr/source/s1 to change to appropriate directory, and then run ed df.c. Then type the following lines, pressing enter after each line (taking care of the whitespace):
/rp0/d
.-2a
  "/dev/rk0",
  "/dev/rk1",
.
w
q
Then compile df by running cc -s -O df.c. Then run the following commands to install it in the correct location:
cp a.out /bin/df
rm a.out
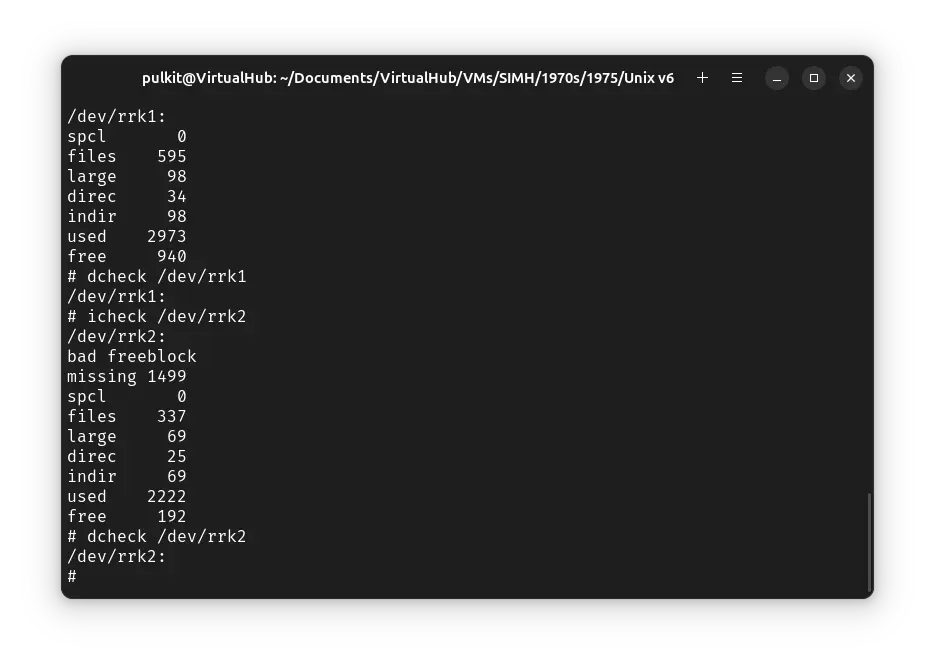
You can check the filesystem by running these commands:
icheck /dev/rrk0
dcheck /dev/rrk0
icheck /dev/rrk1
dcheck /dev/rrk1
icheck /dev/rrk2
dcheck /dev/rrk2
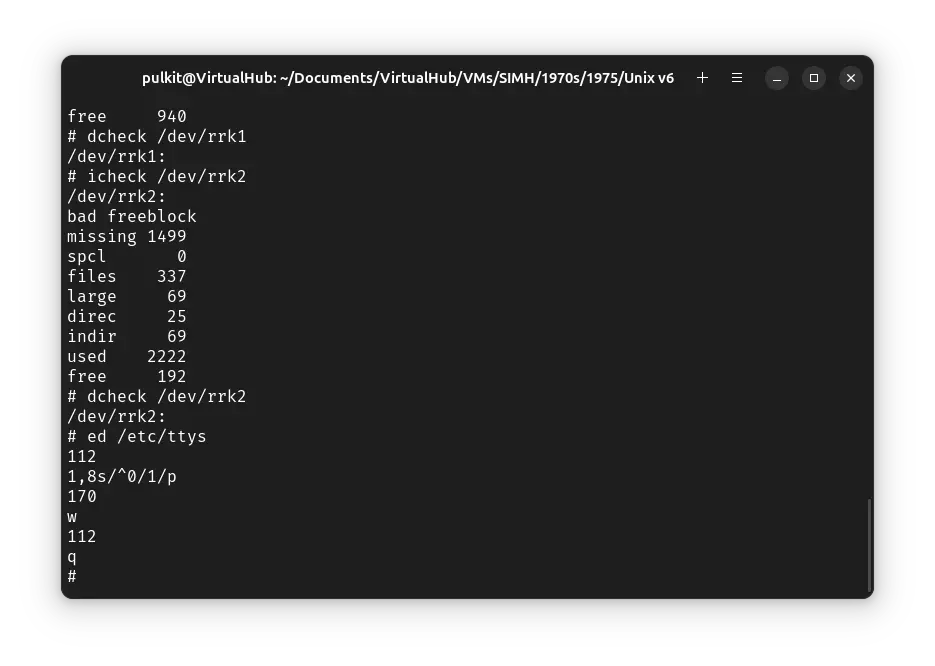
At last we will enable multiuser access for ! Unix. Run ed /etc/ttys, and type the following lines, pressing enter after each line:
1,8s/^0/1/p
w
q
That's it. Now run sync a few times, and then press Ctrl + e to pause the emulation. Enter exit to quit the emulator
We have successfully installed ! Unix v6. Now you can delete the pdp11.ini and dist.tap file.
Running Unix v6
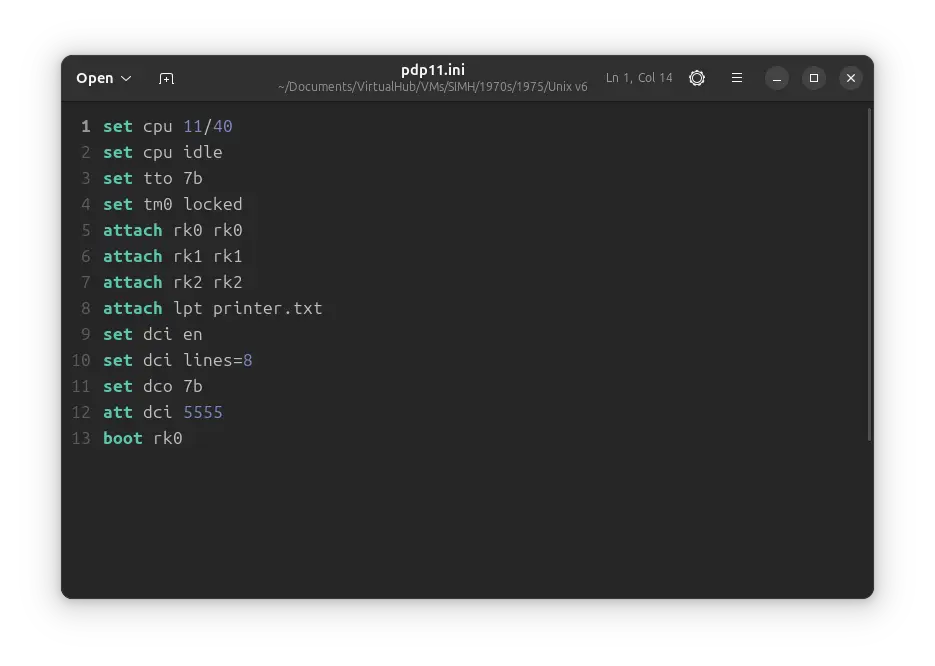
Create a fresh pdp11.ini file with the following contents:
set cpu 11/40
set cpu idle
set tto 7b
set tm0 locked
attach rk0 rk0
attach rk1 rk1
attach rk2 rk2
attach lpt printer.txt
set dci en
set dci lines=8
set dco 7b
att dci 5555
boot rk0
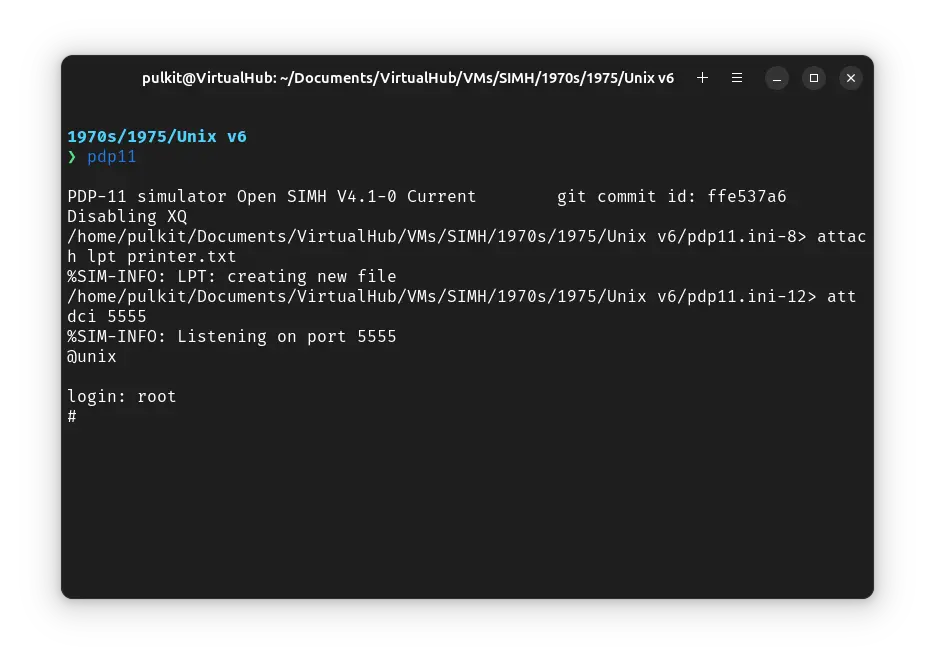
Open a terminal and move to the VM folder. Run the following command to start the emulator:
pdp11
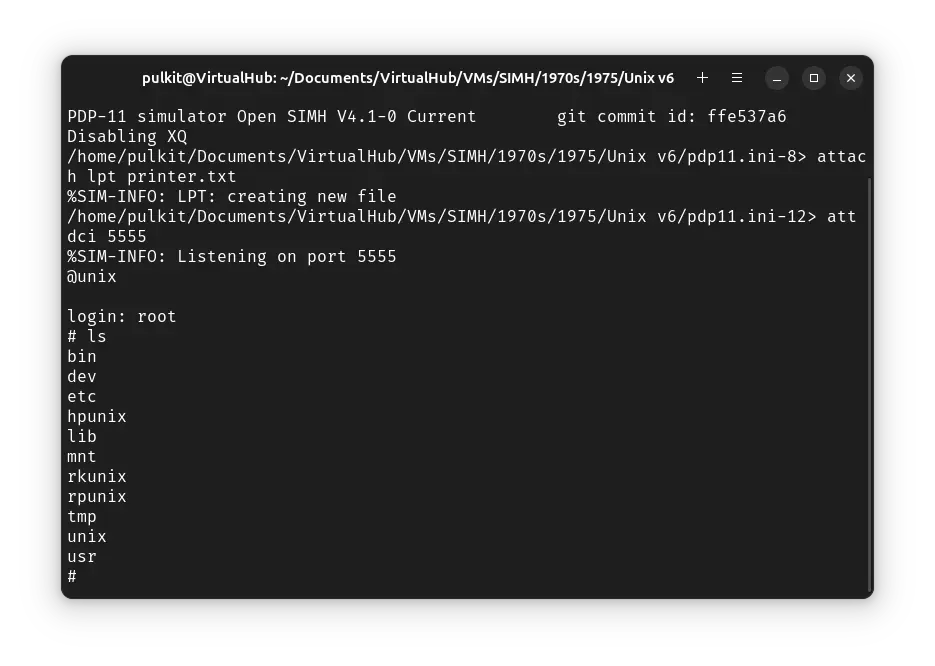
At the @ prompt, type unix and press enter. ! Unix v6 will start.
You will be asked to log in. Type root and press enter to log in. There is no password.
You can now run ls to see the list of files. To change directory, you need to use the chdir command, cd is not available.
That's it! We used ! Unix v6. We can create a shell script to make it easy to launch the VM.
Linux
Create a file called unix-v6.sh with the following content:
#!/bin/bash
pdp11
Now make the file executable:
chmod +x unix-v6.sh
Now you can start the VM using the shell script. For example, on KDE you can right-click the file and choose Run in Konsole or on GNOME, where you can right-click the file and choose Run as executable. The VM will start.
See the manuals section on the main ! Unix v6 page to learn how to use it.
Windows
Create a file called unix-v6.bat with the following content:
pdp11
Now you can start the VM by double-clicking the shell script. See the manuals section on the main ! Unix v6 page to learn how to use it.
Credits
- The tape image above are from the squoze.net website.
- This tutorial is based on Computer History Wiki tutorial on running ! Unix v6 on SIMH.
Video tutorial
Do you want to follow the tutorial by watching a video? We will post a video on our YouTube channel soon.
Archives of this tutorial are available on Wayback Machine.