4.7 KiB
keywords, image, description, sidebar_position, sidebar_label
| keywords | image | description | sidebar_position | sidebar_label | |||||||||
|---|---|---|---|---|---|---|---|---|---|---|---|---|---|
|
./dg-aos-wh-3.webp | We can run ! Data General AOS on the Wild Hare Nova emulator. First, we need to download the ! Data General AOS disk image. You can download the disk image needed to run ! Data General AOS on the Wild Hare Nova emulator from the Wild Hare Legacy Preservation Website website: | 1 | ! Data General AOS on Wild Hare Nova emulator |
How to install ! Data General AOS on Wild Hare Nova emulator?
We can run ! Data General AOS on the Wild Hare Nova emulator. First, we need to download the ! Data General AOS disk image.
Downloads
You can download the disk image needed to run ! Data General AOS on the Wild Hare Nova emulator from the Wild Hare Legacy Preservation Website website:
Using ! Data General AOS
:::tip
If you have not already installed Wild Hare Nova emulator, see the VirtualHub Setup tutorial on how to do so on Linux and Windows.
:::
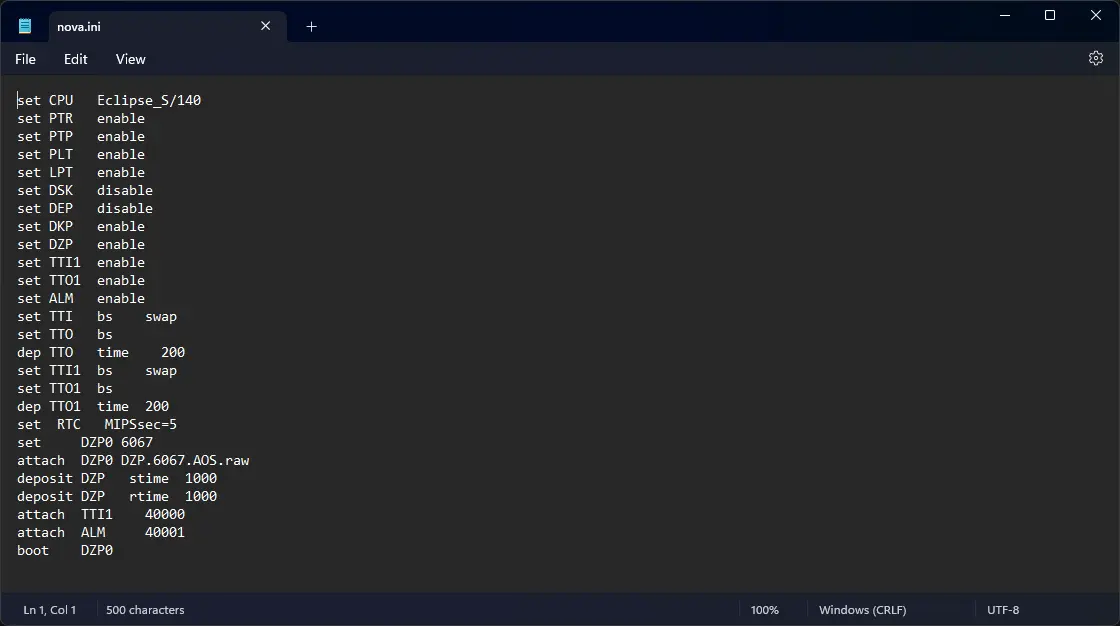
Create a folder somewhere to store the files for this VM and move the disk image you just downloaded into it. Now we will create a config file for our VM. Create a text file called nova.ini with the following content in the VM folder:
set CPU   Eclipse_S/140
set PTR   enable
set PTP   enable
set PLT   enable
set LPT   enable
set DSK   disable
set DEP   disable
set DKP   enable
set DZP   enable
set TTI1  enable
set TTO1  enable
set ALM   enable
set TTI   bs    swap
set TTO   bs
dep TTO   time    200
set TTI1  bs    swap
set TTO1  bs
dep TTO1  time  200
set  RTC   MIPSsec=5
set     DZP0 6067
attach  DZP0 DZP.6067.AOS.raw
deposit DZP   stime  1000
deposit DZP   rtime  1000
attach  TTI1    40000
attach  ALM     40001
boot    DZP0
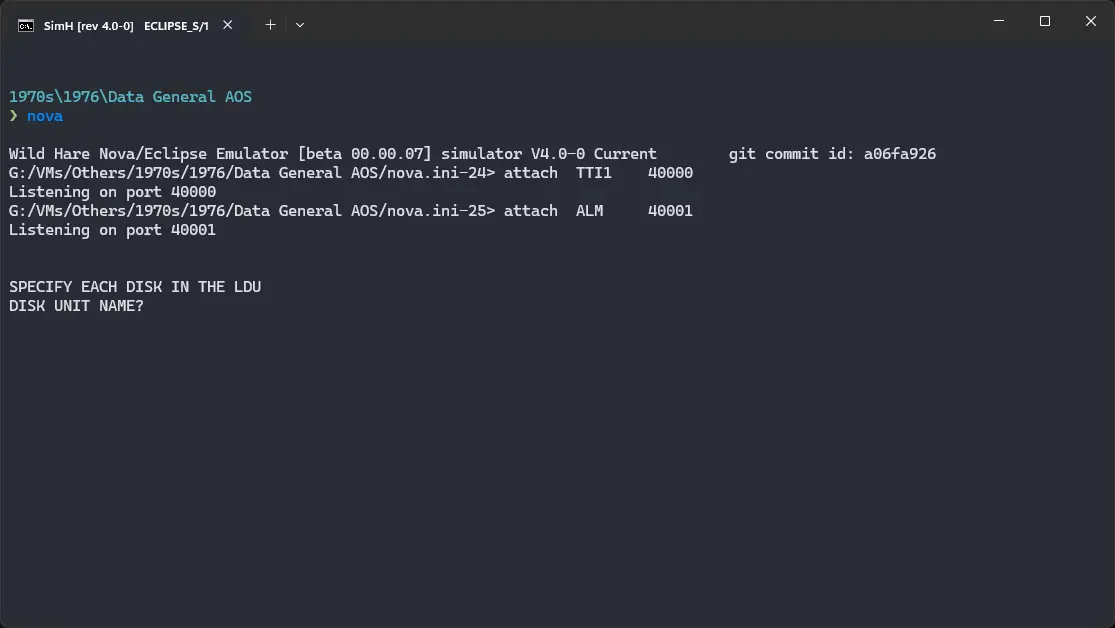
Now open a terminal and move to the VM folder. Run the following command to start the emulator:
nova
When prompted DISK UNIT NAME? , type DPF0 and press enter. When asked for device code and system pathname, just press enter without typing anything.
When asked for date, enter it in MM/DD/YY format. For example, enter 04/13/76. Keep the year in 1970s or 80s, to avoid any issues. Similarly, when asked for time, enter it in HH:MM:SS format. For example, enter 12:55:31. You will be asked if you want to override default specs. Just press enter to accept the defaults.
You will get a ) prompt. Run the following commands:
CHAR/NAS/CPL=166
SEARCH :util : :MACROS :PER
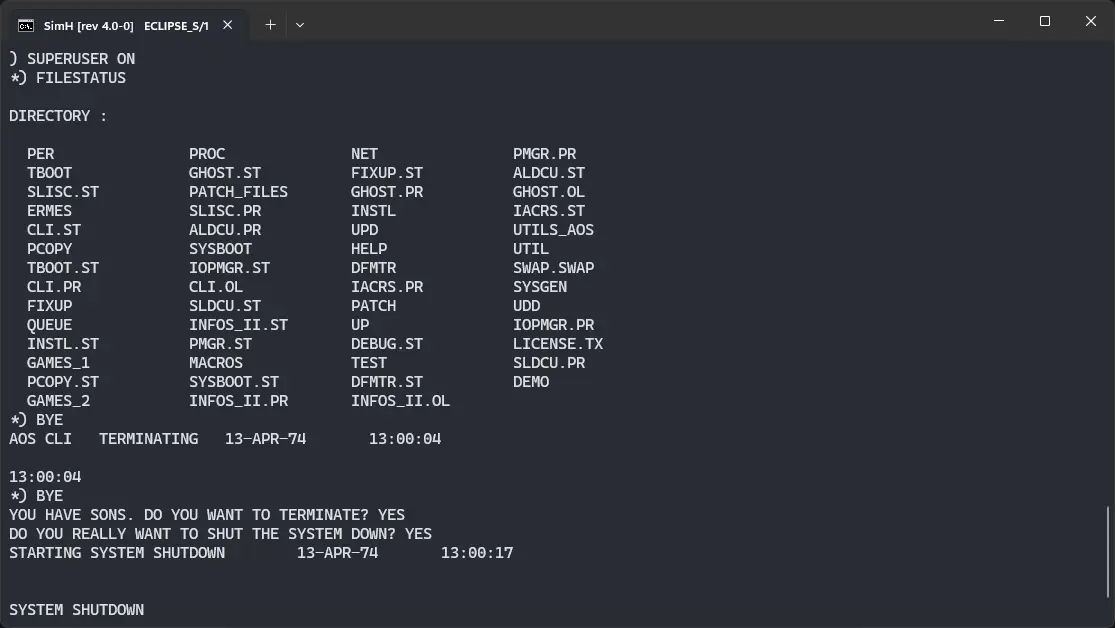
SUPERUSER ON
The prompt will change to *). Type UP and press enter to start ! Data General AOS. Press enter a few times till you get a ) prompt.
Now you can run SUPERUSER ON and then FILESTATUS to list all the files available on the disk.
That's it! We used ! Data General AOS. To exit super user mode, type BYE and press enter. To shutdown the system, run BYE again. You will be asked twice if you really want to shutdown. Type YES and press enter both times to shutdown. Don't worry, it won't harm your children in any way.
We can create a shell script to make it easy to launch the VM.
Linux
Create a file called DG-AOS.sh with the following content:
#!/bin/bash
nova
Now make the file executable:
chmod +x DG-AOS.sh
Now you can start the VM using the shell script. For example, on KDE you can right-click the file and choose Run in Konsole or on GNOME, where you can right-click the file and choose Run as executable. The VM will start.
See the manuals section on the main ! Data General AOS page to learn how to use it.
Windows
Create a file called DG-AOS.bat with the following content:
nova
Now you can start the VM by double-clicking the shell script. See the manuals section on the main ! Data General AOS page to learn how to use it.
Credits
- The disk image and other files used above are from the Wild Hare Legacy Preservation Website website.
Video tutorial
Do you want to follow the tutorial by watching a video? We will post a video on our YouTube channel soon.
Archives of this tutorial are available on Wayback Machine.


